Building a Fast and Secure VNC Service from Scratch
Since my dorm room computer has a public IP address, and commercial remote desktop software often suffers from high latency due to relay servers, coupled with my personal distrust of their security, I decided to set up my own VNC service.
This allows me to connect back to my dorm room computer from the lab with low latency while ensuring a certain level of security.
At the very least, TigerVNC should recognize the "Connection is secure" without any exemption.
Prerequisites
- Your own domain name.
- A public IP address (theoretically, both IPv4 and IPv6 should work; this article uses IPv4 as an example).
Steps
Applying for DDNS
My domain was purchased from Namecheap, but I host my DNS service with Netlify. If you're in the same situation, you can use Netlify Dynamic DNS to automate the DDNS process. Of course, if you're a Cloudflare user, there should be more tutorials available online, so I won't go into detail here. Below is my code:
#!/bin/bash

# Configuration
ACCESSTOKEN="<access_token>"                 # Netlify API access token
ZONE="example.com"                           # Domain name (Netlify DNS zone)
RECORD="subdomain"                           # Subdomain (subdomain.example.com)

# Get the current public IPv4 (without using proxy)
IP=$(curl --noproxy '*' -s http://ipv4.icanhazip.com)

# Disable IPv6 updates and ensure no proxy for Netlify requests
NDDNS_IPv6_ENABLED=false no_proxy="*.netlify.com" nddns_linux -accesstoken "$ACCESSTOKEN" -zone "$ZONE" -record "$RECORD"

# Log the update
echo "$(date): Updated $RECORD.$ZONE to IP $IP"
Then enable a scheduled task in systemd:
~/Desktop/tmp                                                                                                                                                                 10m 8s 22:12:16
> cat /etc/systemd/system/ddns-update.service
[Unit]
Description=Run DDNS update script

[Service]
Type=oneshot
Environment="http_proxy=<http_proxy>"                 # If you need proxy
Environment="https_proxy=<https_proxy>"               # If you need proxy
ExecStart=/bin/bash /home/junyu33/Desktop/tmp/ddns.sh

~/Desktop/tmp                                                                                                                                                                        22:12:42
> cat /etc/systemd/system/ddns-update.timer
[Unit]
Description=Run DDNS update script every 30 minutes

[Timer]
OnBootSec=5min
OnUnitActiveSec=30min
Persistent=true

[Install]
WantedBy=timers.target
This way, your domain will have an additional TXT record containing your computer's public IP.
If your computer has sshd enabled at this point, you should be able to connect to it using ssh user@subdomain.example.com.
Installing TigerVNC Service
Refer to this article: https://www.digitalocean.com/community/tutorials/how-to-install-and-configure-vnc-on-ubuntu-20-04
Read until Step 2. Although Step 3 does provide actual security, the TigerVNC client will still consider the connection insecure.
Additionally, this article only covers the installation of the TigerVNC server. The command to install the client on Xubuntu is:
sudo apt install tigervnc-viewer
Complete the certbot DNS-01 challenge to obtain a certificate
The certbot package on Xubuntu seems to have issues, so I opted for the certbot pip package in a conda virtual environment:
pip3 install certbot
certbot certonly --manual --preferred-challenges dns --config-dir ~/Desktop/tmp --work-dir ~/Desktop/tmp --logs-dir ~/Desktop/tmp -d subdomain.example.com
Then, follow the prompts to add the TXT record.
After completion, you will find the certificate files in ~/Desktop/tmp/archive/subdomain.example.com/.
> /bin/ls -al
total 16
drwxrwxr-x 1 junyu33 junyu33   90 Sep 22 20:45 .
drwx------ 1 junyu33 junyu33   48 Sep 22 20:45 ..
-rw-rw-r-- 1 junyu33 junyu33 1273 Sep 22 20:45 cert1.pem
-rw-rw-r-- 1 junyu33 junyu33 1566 Sep 22 20:45 chain1.pem
-rw-rw-r-- 1 junyu33 junyu33 2839 Sep 22 20:45 fullchain1.pem
-rw------- 1 junyu33 junyu33  241 Sep 22 20:45 privkey1.pem
Configuring TigerVNC Secure Connection
Copy your certbot certificates to ~/.vnc/:
# Server certificate and private key
cp ~/Desktop/tmp/archive/subdomain.example.com/cert1.pem ~/.vnc/subdomain.example.com-SrvCert.pem
cp ~/Desktop/tmp/archive/subdomain.example.com/privkey1.pem ~/.vnc/subdomain.example.com-SrvKey.pem
The prefix of the pem files here may not necessarily be
subdomain.example.com, but when starting TigerVNC later, the correct pem files must be specified.
Then restart the TigerVNC service:
vncserver -kill :2
vncserver -SecurityTypes=X509Vnc -X509Cert=/home/junyu33/.vnc/subdomain.example.com-SrvCert.pem \
          -X509Key=/home/junyu33/.vnc/subdomain.example.com-SrvKey.pem -localhost=no -geometry=1920x1080 :2
Next, copy chain1.pem to the client machine's ~/.vnc/ directory:
# Client certificate chain
scp ~/Desktop/tmp/archive/subdomain.example.com/chain1.pem user@client.com:~/.vnc/chain1.pem
And modify the client machine's ~/.vnc/default.tigervnc to ensure this line has the correct value (add it if it doesn't exist):
X509CA=/home/junyu33/.vnc/chain1.pem
At this point, when starting TigerVNC, you should directly see the message "Connection is secure" and be prompted to enter the password. Success!
FAQ
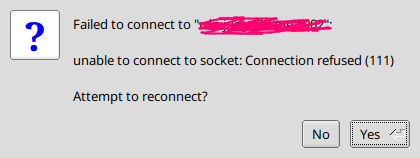
Issue Zero (Unable to Connect):

- Check if your DDNS is down.
- Check if your firewall is turned off.
- Check if your TigerVNC service is running.
Issue 1 (unknown authority, no Let's Encrypt):

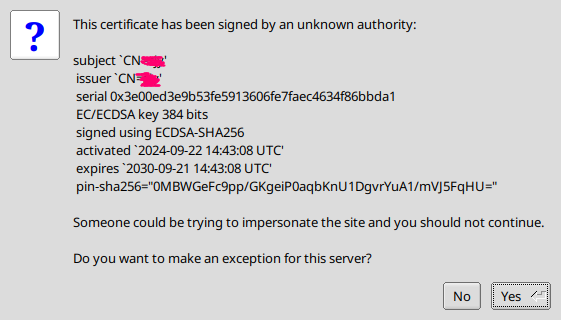
TigerVNC is using your system's self-signed certificate instead of the Let's Encrypt certificate. You can find the following log entry in the startup logs:
You will require a certificate to use X509None, X509Vnc, or X509Plain.
I will generate a self signed certificate for you in /home/junyu33/.vnc/<hostname>-SrvCert.pem.
This may be because you did not include the -X509Key and -X509Cert parameters when executing the command to restart TigerVNC.
Issue 2 (Domain and Certificate Mismatch):

The cause is likely similar to the previous issue: when restarting the TigerVNC command, the -X509Key and -X509Cert parameters were not included. As a result, a self-signed certificate was used, and your computer's hostname naturally does not match the server you are connecting to.
Another possible reason is that the domain name you applied for with certbot does not match your hostname. The domain names must be exactly identical, including both parent and subdomains.
Issue 3 (unknown authority, involving Let's Encrypt):

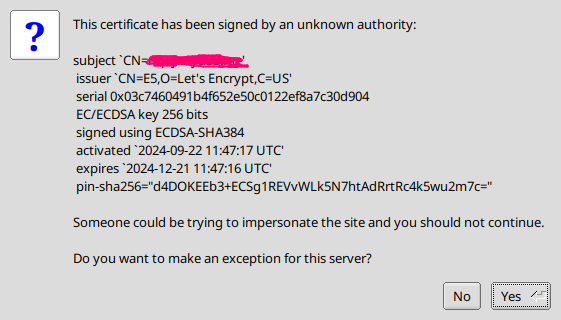
The chain1.pem file in your .vnc directory was not copied correctly (or does not exist on the client machine), or your default.tigervnc file is not configured properly.
Issue 4 (TLS Initialization Error):

Check whether the paths for copying the certificate and private key are correct, and ensure that you have not copied two certificates or two private keys.
Question 5 (TigerVNC Startup Issue):
> vncserver

New Xtigervnc server '<hostname>:3 (junyu33)' on port 5903 for display :3.
Use xtigervncviewer -SecurityTypes VncAuth -passwd /tmp/tigervnc.E2491i/passwd :3 to connect to the VNC server.


=================== tail /home/junyu33/.vnc/<hostname>:3.log ===================
The XKEYBOARD keymap compiler (xkbcomp) reports:
> Warning:          Could not resolve keysym XF86CameraAccessEnable
> Warning:          Could not resolve keysym XF86CameraAccessDisable
> Warning:          Could not resolve keysym XF86CameraAccessToggle
> Warning:          Could not resolve keysym XF86NextElement
> Warning:          Could not resolve keysym XF86PreviousElement
> Warning:          Could not resolve keysym XF86AutopilotEngageToggle
> Warning:          Could not resolve keysym XF86MarkWaypoint
> Warning:          Could not resolve keysym XF86Sos
> Warning:          Could not resolve keysym XF86NavChart
> Warning:          Could not resolve keysym XF86FishingChart
> Warning:          Could not resolve keysym XF86SingleRangeRadar
> Warning:          Could not resolve keysym XF86DualRangeRadar
> Warning:          Could not resolve keysym XF86RadarOverlay
> Warning:          Could not resolve keysym XF86TraditionalSonar
> Warning:          Could not resolve keysym XF86ClearvuSonar
> Warning:          Could not resolve keysym XF86SidevuSonar
> Warning:          Could not resolve keysym XF86NavInfo
Errors from xkbcomp are not fatal to the X server
X connection to :3 broken (explicit kill or server shutdown).
 ComparingUpdateTracker: 0 pixels in / 0 pixels out
 ComparingUpdateTracker: (1:-nan ratio)
Killing Xtigervnc process ID 8172... success!
=========================================================================

Session startup via '/etc/X11/Xtigervnc-session' cleanly exited too early (< 3 seconds)!

Maybe try something simple first, e.g.,
	tigervncserver -xstartup /usr/bin/xterm
The X session cleanly exited!
The Xtigervnc server cleanly exited!
This error is quite tricky, and I haven't been able to identify the root cause.
In my case, /usr/bin/xterm could run normally. While debugging, I tried starting TigerVNC on :0 (usually it's :1 or :2), which caused errors in the xfce4 interface. I didn't carefully read the error dialog, and as a result, some icons on the taskbar were removed by the system. Since I didn't know how to restore them, I simply rolled back /home using btrfs.
Surprisingly, after rolling back /home, this issue disappeared.
Question 6 (The authentication mechanism requested cannot be provided by the computer):
This error appears in the RVNC Viewer client on a mobile phone. Strangely, if encryption is not used, the mobile client can connect (though it will still report an insecure connection error).
However, I don't really use VNC on my phone anyway, so I'll just ignore this issue.